
When attempting to view the results from an e-Discovery export of a user's mail, the system will typically generate a file in the .PST format. This file cannot be viewed without mapping it to Outlook.
1. Click on the "File" tab in the upper left hand corner of Outlook, and on the menu that appears, you will click on "Account Settings", and then select it again.
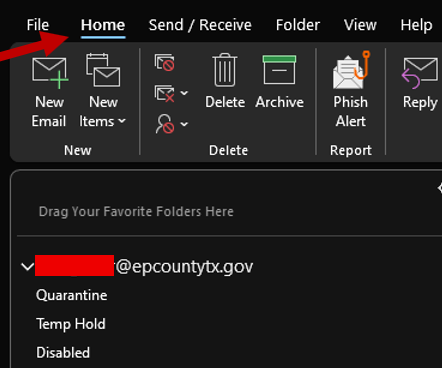
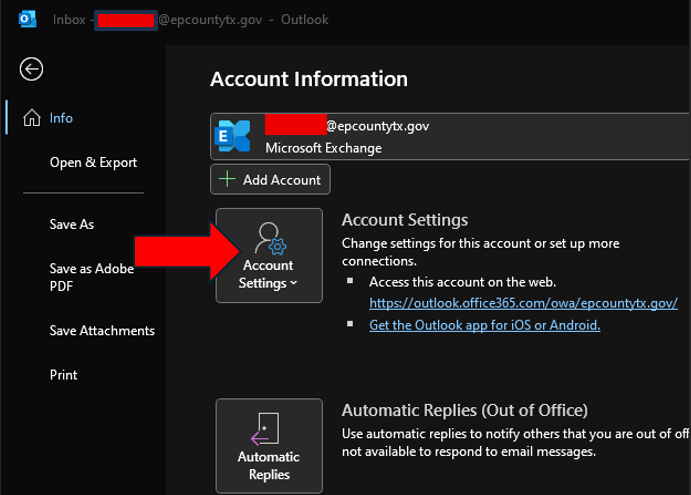
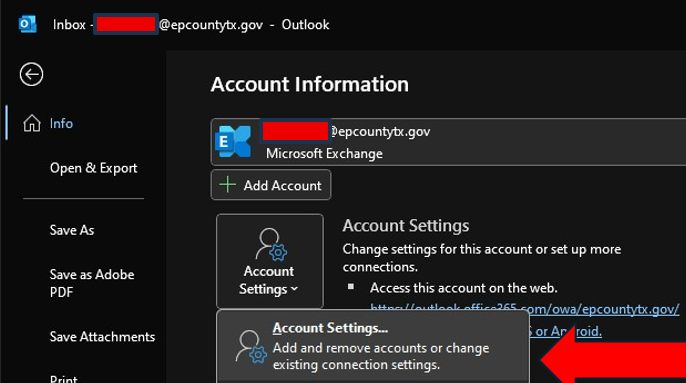
2. On the menu that appears, you will click on the "Data Files" tab, and then select "Add..."
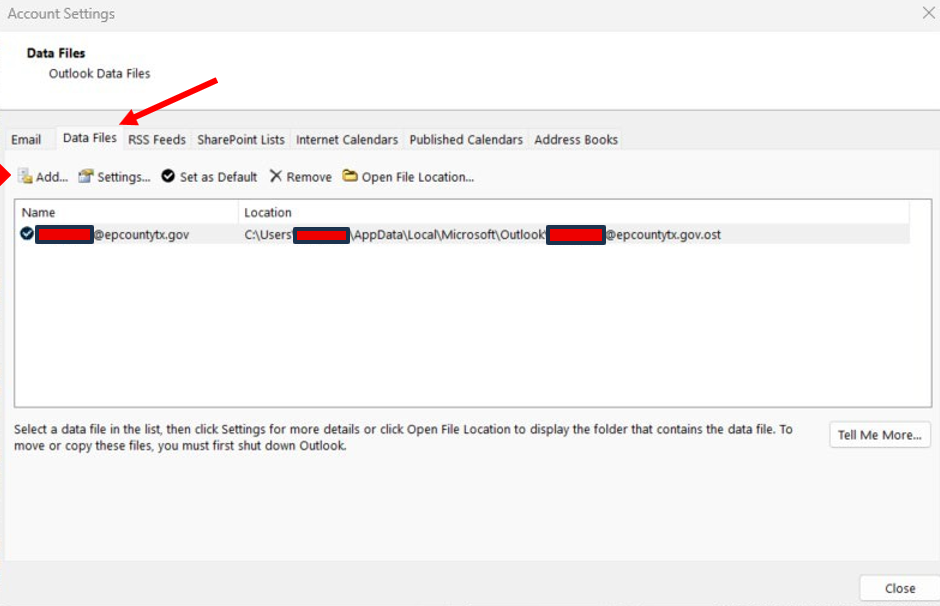
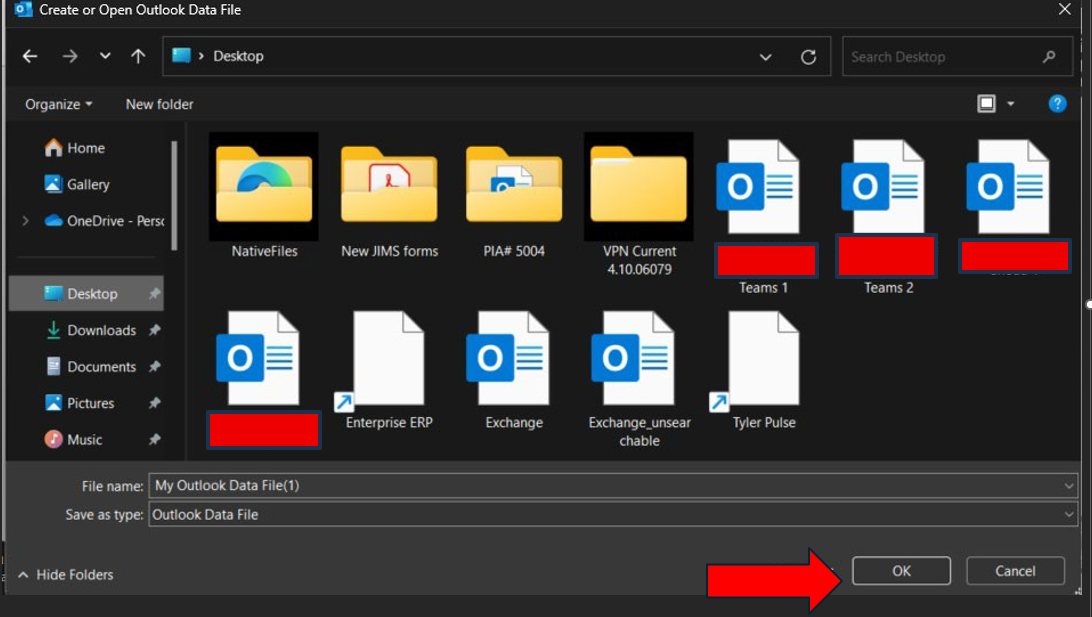
3. On the browsing window that appears, you will navigate to where the .PST files has been saved. Once the correct file has been selected, hit "Ok"
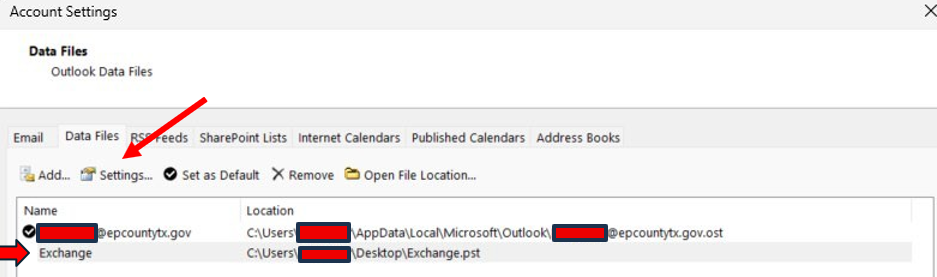
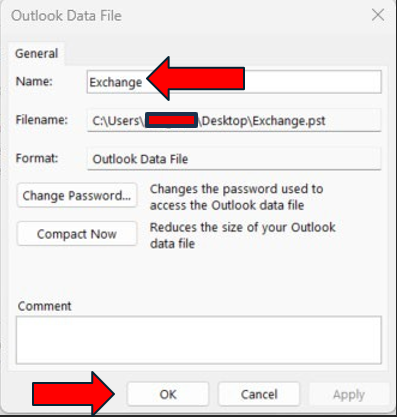
4. Back on the Account Settings screen, you can rename the file according to whatever you prefer, for easier identification in Outlook. While having the file highlighted, select "Settings" and change the name to whatever identifier you wish. Select OK when you have completed the change.
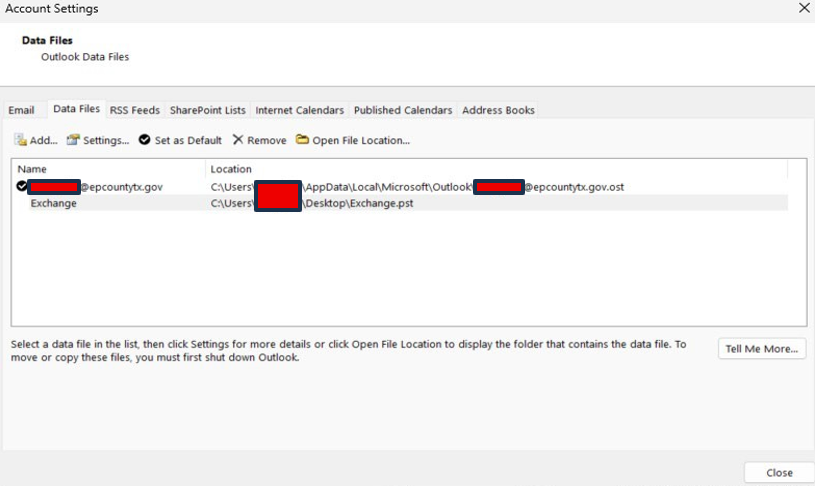
5. Back on the Account Settings screen, hit Close.
6. In Outlook, in the navigation pane on the left, the connected .PST file should now show. Click the arrow to expand the folders, and select the folder that contains the data. Please have patience, as it can take a little time for Outlook to display the data.